
Checking brake pads without removing the wheel

You can perform a basic visual inspection of your brake pads without removing the wheel. While this method isn't as comprehensive as a professional inspection, it can give you a general idea of the brake pad condition. Here's how you can do it:
1. Park Safely:
Park your vehicle on a level surface and engage the parking brake.
2. Clear Visibility:
Turn the steering wheel to the side that gives you the best view of the brake components.
3. Visual Inspection:
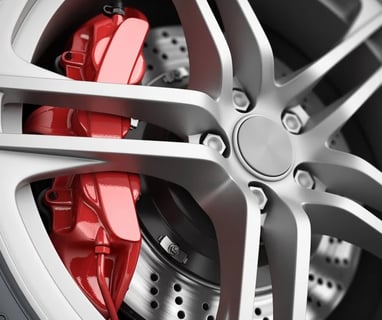
Look through the wheel spokes to see the brake caliper and rotor.
You might need a flashlight to get a clear view.
4. Brake Pad Thickness:
On most vehicles, you should be able to see the outer brake pad against the rotor.
Estimate the thickness of the visible brake pad material. New brake pads typically have around 8-12mm of thickness. If the pad material looks very thin (around 3mm or less), they might need replacement soon.
5. Even Wear:
Check for even wear across the brake pad surface. If one side is significantly more worn than the other, it could indicate a caliper issue.
6. Warning Indicators:
Some brake pads have wear indicators – small metal tabs that touch the rotor when the pad material becomes thin. These indicators can produce a squealing noise while driving.
If you see these tabs close to the rotor, it's a sign that the pads need replacement soon.
7. Brake Dust:
Excessive brake dust on the wheel can indicate that the brake pads are wearing down.
8. Repeat for Other Wheels:
Repeat the inspection for all four wheels, as wear might vary from one set of brake pads to another.
Remember that this visual inspection is a basic way to gauge brake pad wear. If you're unsure about the condition of your brake pads or if you notice any issues during this inspection, it's advisable to have a professional mechanic perform a thorough inspection. Brake safety is crucial for your vehicle and your well-being, so always err on the side of caution when it comes to brake maintenance.